Upholstery repair may be a lucrative facet of a upholstery or interior design business, for someone who has both upholstery and problem-solving skills. However, some simple furniture repairs, like repairing a button, may be achieved by anyone with patience who can get the job done carefully and methodically.
I rigged this job by removing one of the buttons which included a diamond tuft in the back of a seat, so that you may see exactly how to replace missing buttons, or undertake your chair restyling by adding a simple tufted detail. This upholstery know-how will spare you the money you’d spend on a service call or a new seat.
I’ll warn you now: You could get anxious in the center of this fix, but hang in there. You can certainly do it. Persevere. And in the event that you get anxious, send me a message.
With the confidence and ability to thoroughly unhitch and rehitch the outside rear of a piece of furniture may come in quite handy for an array of upholstery projects, problems and repairs, whether you are a DIYer or a specialist.
Upholstery Club’s Shelly Leer
The top-right button with this seat is missing. We’re going to fix it.
Materials needed:
Long tufting needleUpholsterer’s twineFabric-covered buttonFlat-head screwdriverCrescent or needle-nose pliersElectric staple gun
Upholstery Club’s Shelly Leer
The secret to locating cloth for a new button: You will understand that there are a few hidden places on your seat at which you can extract some extra cloth for buttons. Request an upholstery store to make you a covered button or two out of it. In my area it costs around approximately $1 per match.
Upholstery Club’s Shelly Leer
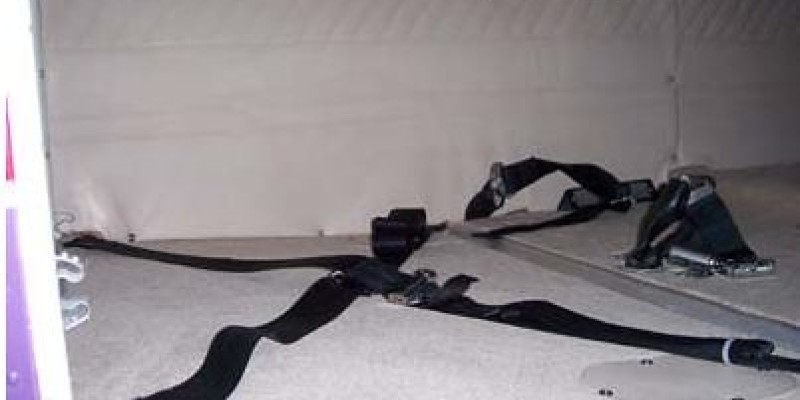
Utilize a flat-head screwdriver to carefully get inside the alloy ply grip that holds the faces of the trunk in place. Here I was only checking to determine how easy it would be to release the cloth. You will also require a pair of crescent or needle-nose pliers to remove the principles, and an electric staple gun to fasten the cloth when you are finished.
Upholstery Club’s Shelly Leer
To pull a button during the inside front, you ought to be able to access the inside of the rear of the seat. Start by removing the cardboard tack strip in the bottom rail of the outside rear piece.
Upholstery Club’s Shelly Leer
After the tack strip is off, then carefully remove the basics in the covered welt cord.
Tip: Take photos so you’ll know how to put everything back together again.
Upholstery Club’s Shelly Leer
Now you are down to the meat of the matter: the seat back fabric. Carefully, and I mean carefully, lift and remove the principles to publish the cloth.
Upholstery Club’s Shelly Leer
Once the bottom is released, remove the cloth from the alloy ply grip, or anything system was utilized to affix the cloth against the cording. With pliers, remove the old alloy ply grip and eliminate it.
Upholstery Club’s Shelly Leer
Here you might see only a dacron or cotton layer, but you need to also see a layer of burlap, or even cardboard. Eliminate the staples or tacks holding it in place so that you may see the burlap webbing as well as the twine that’s holding the buttons tight.
Upholstery Club’s Shelly Leer
Utilize a solid twine (upholsterer’s twine is greatest). Twist the twine in half, push the fold through the eye of this needle about 1 inch, then thread the cut ends through the loop to guarantee the button onto the twine. Now thread the cut ends through the eye of this needle.
Upholstery Club’s Shelly Leer
Push the needle through the existing hole so that the twine ends come through the back of the seat. Pull the button snugly to match the depth of the buttons.
Upholstery Club’s Shelly Leer
Holding the twine securely, staple the twine to a side or top rail to hold the button deep in place. If the burlap and webbing on my seat had been tighter, I would have tied the twine around a tiny bit of rolled-up webbing or cotton for leverage.
Stapling to the rails is not a standard method, but I’ve never needed a button come loose. Staple the twine securely, then double click the twine back itself and staple again.
Upholstery Club’s Shelly Leer
Time to shut up. As you can see in the photo, I had a tiny rip in the bottom border of the cloth. Fortunately, it didn’t tear up to be a issue. I managed to pull the cloth down and attach it under the ground rail without the tear’s being visible.
Within the next tutorial, I’ll show you my favorite way to shut up the outside side edges: the ever-so-professional invisible upholsterer’s stitch. After that the cording can be reattached, as well as a bit of cardboard tack strip and a dust cap. The upholsterer’s stitch is a must-have in your upholstery skills toolbox.
More: See how to make an upholstered headboard you can change on a whim